Tuesday, March 20, 2012

TWD - Irish soda bread

The second recipe of March was Irish Soda Bread, found on page 214 of Baking with Julia by Dorie Greenspan.  This was such a simple recipe and was a really nice baking break after the Rugelach, which were not terribly difficult but involved lots of steps and waiting.  If you would like the recipe you can find it at the following blogs by Carla and Cathleen.   If you would like to see how everyone did this week click here.

I didn't take pictures of the process this week, there wasn't a lot to it and I was feeling a bit lazy to be quite honest :/  We were so busy on actual St Patrick's day that we decided to celebrate on Sunday the 18th instead.  By celebrate, I mean eat! 

The dough came together so easily.  I wasn't sure if I had done it right, but it baked up nicely.  I opted to add a cup of raisin's as I love a good raisin bread slathered with creamy butter.  The dough itself was more wet than I would have predicted from the description in the book but I didn't want to add more flour or risk over working the dough.  So I just went with it and crossed my fingers. 


If you are looking for a lighty airy bread, don't go for this.  It doesn't have any yeast so it doesn't get that airation that you would get from a yeast dough.  I actually like that about it, a good dense bread is my favourite kind.  This certainly delivers on that.  It had a nice flavour and because of the density I couldn't sit down and consume the entire loaf by myself.  I am sure I could give it a valiant effort though.  Luckily for my hips I have five children and a husband who are more than happy to help out when it comes to eating baked goods.

Next month we are making Pizza Rustica and Lemon Loaf Cake.  I really need to make sure I work out plenty in April, it is looking to be a delicious month!

Thursday, March 15, 2012

Pavlova

My oldest son turned 14 today.  We aren't really a cake family, birthdays are usually the only time we do indulge in it.  Good cakes are really hard to come by.  I am a fan of Tres Leches myself.  Hubs likes a good chocolate cake.  Finn a strawberry cake.  The rest of the clan don't really have a preference.  So as birthdays approach I start asking what type of cake/dessert they would like me to make.  Last year for his 13th Owen chose a pavlova so I wasn't expecting him to want it again.  He surprised me by requesting it!  I certainly don't mind, it is one of the most scrumptious desserts out there.  I'm not kidding.  You must try Pavlova sometime.  It is not difficult to make and is always a crowd pleaser! 

We usually go out for lunch on family member birthdays, so I was sure to get the pav in the oven well before it was time to leave.  It takes 80 minutes in the oven and then needs to cool entirely in there as well.  So I got busy and it was done cooking before we left to go out.  I just left it in the cooling oven while we were out.  It worked out perfectly.

 First of all you do this (you can see it was already after noon before I got it in the oven, that bacon and egg breakfast took longer than I thought :) )


Then you separate your egg whites from the yolks.  You need 150 ml of egg whites, which is generally about 4 large eggs.  However this time the eggs must have been a touch smaller because it took 5 to get 150ml. So make sure to measure!


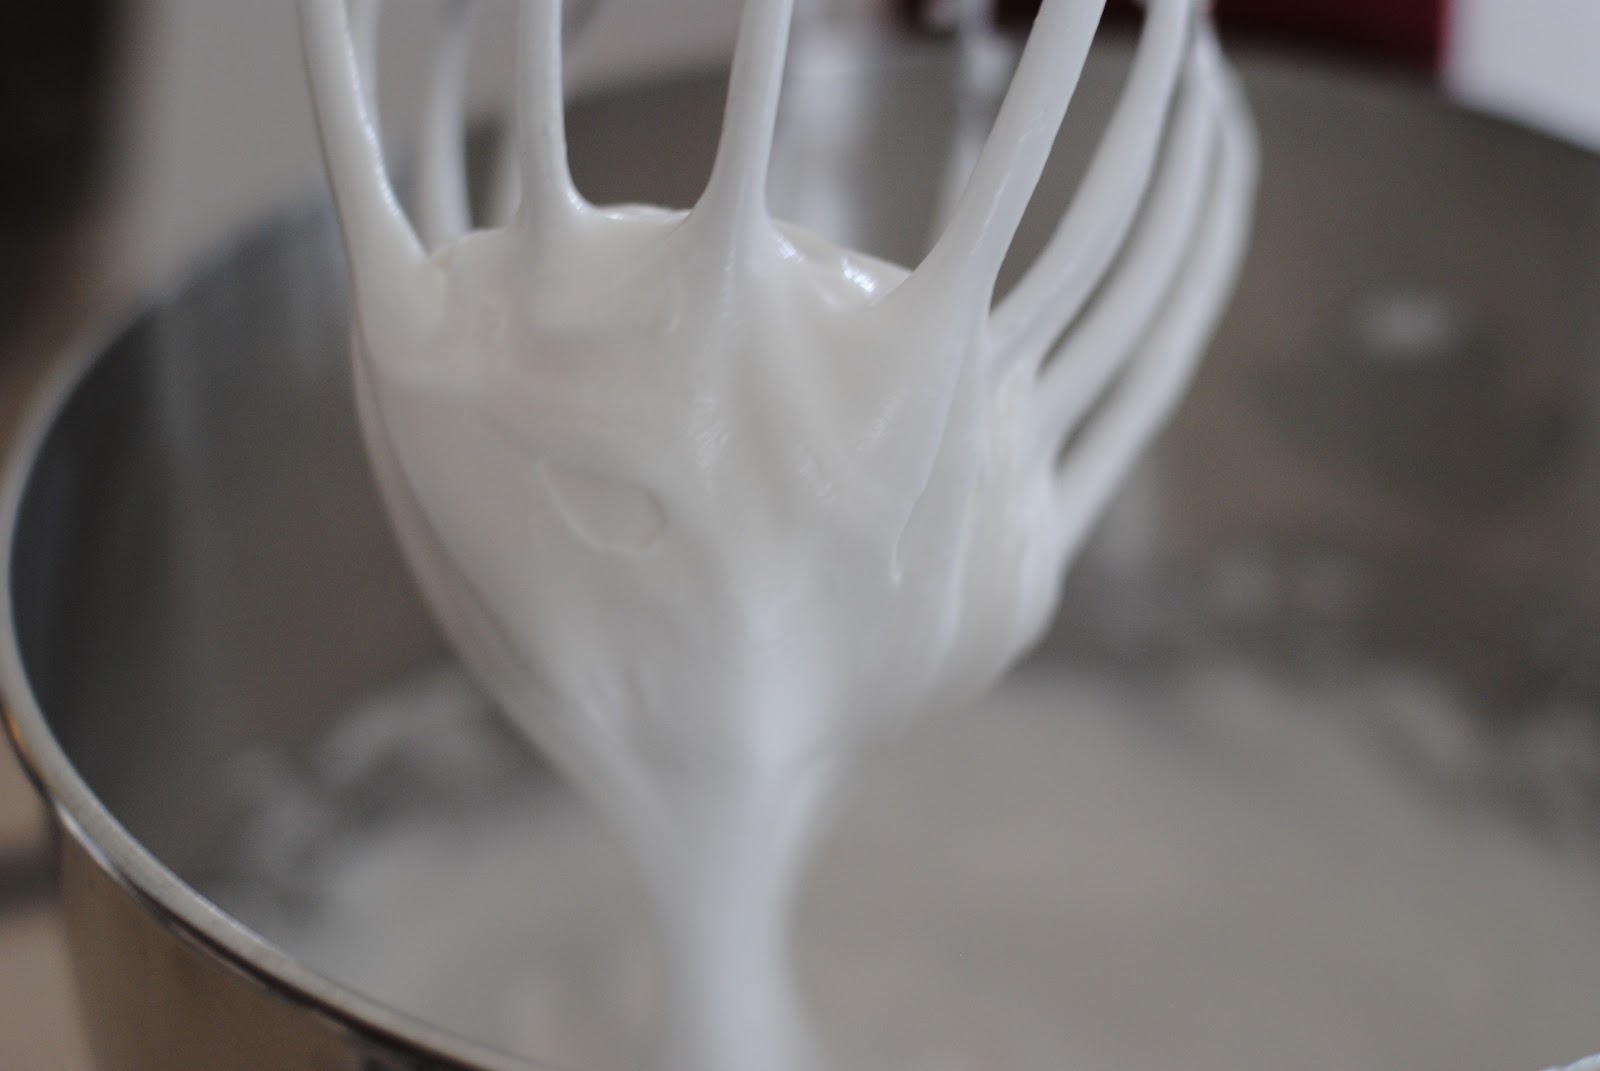
Whip them with the whisk attachment until stiff.


and then slowly add the castor (bakers) sugar until smooth and glossy.


After it's smooth and glossy and all of the sugar is dissolved, (rub some of the meringue between your fingers to feel for any sugar that hasn't dissolved), add the corn starch and vinegar and mix until combined.


Then empty contents of mixing bowl onto cookie sheet/jelly roll pan that is lined with parchment paper.  It doesn't look pretty, but it will.  Trust me!


Take an offset spatula, or whatever you have that will work.  I find it easier with the offset spatula but I made Pavlova for many years without one!  Shape it in a circular shape and flatten the top a little.  It also works to concave the top a little to make it easier to pile the fruit and cream on top later.


  Once you are happy with how it looks adjust your oven temperature.  You want the oven to start at 300F but lower it when you put the pavlova in and bake it at 250F for the entire baking time.  I set my timer so that the oven turns off when it is done cooking, that way I can pop it in and forget about it.  Easy!


Here is how it looks at the end of the cooking time


After it has cooled I remove it from the oven and place on the serving plate.


The next step is the whipped cream.  Now don't go buying cool whip or cream in a can.  It's not the same and this dessert is worthy of the real thing.  I like to add a touch of caster sugar and a splash of vanilla to good old whipping cream.  Whip it up with your whisk attachment and slather it over the top of the Pavlova.  Some people put it down the sides as well, I personally think it doesn't need that much whipped cream but I hold no judgement of those who do! 


Then take some fresh berries (we used strawberries, raspberries and blackberries).  Blueberries are also really good on Pavlova, as is Kiwi Fruit.  Have fun with it and use what you like, it is very versatile! 


However if you can, get your hands on the following ingredient.  It makes all the difference, but here in the states it can be difficult to come by.  The magical ingredient is Passionfruit.  You can occasionally buy it at natural grocery stores or asian markets.  Trust me when I tell you that it is almost a required ingredient.  Sure the pav will taste good with the berries, kiwi, whipped cream and whatever other fruit you choose to add but it won't be phenomenal.  The passionfruit magically transforms this dessert from really good to phenomenal.  Seriously!  Now in Australia you can buy your passionfruit like this


So I keep some of this on hand for Aussie desserts, it keeps me sane and my family well fed :)


Isn't this beautiful?

I think so.


By the time I cut into the Pavlova I was losing my natural light so the picture isn't great.  Pavlova has a lovely pillowy centre, that melts in your mouth, with a lightly crunchy outer crust.  It is such a delicate dessert and so lovely to eat.  If you plan to serve it be sure to add the cream and fruit right before you serve it, it can get soggy if you leave it too long.  It doesn't keep well either so plan on finishing it off.  That is no problem in our house, but if there were less of us I would need to adjust the amounts to make it more manageable.


I hope you try it soon, you won't be sorry you did!
Here is the recipe just in case :)


1. Preheat oven to 300°F.

2. Place the eggwhite in the bowl of an electric mixer and whisk until stiff peaks form. Gradually add the sugar, whisking well, until the mixture is stiff and glossy. Add the cornstarch and vinegar and whisk until just combined. Shape the mixture into a circle on a baking tray lined with parchment paper.

3. Reduce oven to 250°F and bake for 1 hour 20 minutes. Turn the oven off and allow the pavlova to cool completely in the oven.

4. Decorate with fresh whipped cream and fresh fruit.


Wednesday, March 14, 2012

It's heating up over here!

So what is more appropriate in warm weather than Iced Coffee?  I first saw a wonderful tutorial on The Pioneer Woman's site here and decided to give it a shot.  There were multiple steps and some time involved but none of it was difficult.

I purchased these big (giant) jars at Wal-Mart for around $10 each.  They were such a good deal.  Now I use them to store sugar and flour on my kitchen counter for easy access while baking!  I love them.  You leave the coffee and water in the jar for around 8 hours or longer and then strain into second container. 


 I lined the mesh strainer with cheesecloth as was recommended in the original tutorial.  I really didn't want stray coffee grounds. Blech.  Here it is straining through the cheesecloth and the mesh strainer. It doesn't look so appetizing but it smelled so good (if you like the smell of coffee), I do!


I poured the finished product into a drink dispenser so we could just pop it in the fridge and access easily when we needed an icy pick-me-up.


I like my iced coffee with whole milk and a couple of spoons of sugar.  I like slurping up some crunchy bits of (not yet dissolved) sugar and creamy cold coffee.  Yum.  I am definitely intrigued to try The Pioneer Woman's other variations of this simple recipe.  So glad the weather is getting warmer so we can drink more icy coffee drinks :)

Tuesday, March 6, 2012

TWD - Rugelach


A new week and a new challenge.  This time we are baking Rugelach on page 325 of Baking with Julia. Our hosts this week are Margaret and Jessica , if you would like the recipe they will have it on their blogs.  If you want to see how everyone else did this week you can check that out here .   I was excited to try the Rugelach but was once again pretty intimidated.  I wanted to make the Apricot Lekvar (pg 449 BWJ) but I had never blanched OR toasted almonds before and was a little nervous about that.  Which of course caused me to procrastinate until the last minute!

After I finally decided to tackle it though it really wasn't difficult.  Surprise!!  I had no idea how simple blanching almonds was and how easily the skin comes off after.  Pretty cool!  I definitely OVER toasted them, I was getting bored watching them and moving them around, went to get a drink and came back to pretty toasty almonds LOL  It's all good.  I picked out the lighter ones in the batch and continued on :)


The lekvar came together very quickly, I chose to only do apricot because I know my family didn't want the prunes.  Hubs and I had eaten our fair share of prunes on our cleanse from a couple of weeks ago and don't really have any desire to revisit the flavour anytime soon!  So sad, I loved prunes normally!  Maybe one day I will be able to eat them again. 

2 cups of apricots ready for simmering


Blended into a beautiful bright orange


Mixing in the (overly)toasted almonds :)


Ready for the fridge


After I finished the Lekvar I got started on the Rugelach recipe.  Instead of waiting a couple of hours for butter to come to room temperature I cut it up into smaller cubes so it would warm up faster.  Patience is not a virtue I often claim to have!


Butter, cream cheese and sugar


Before flour


After.  It rolled up so nicely and was a lovely soft dough


The dough came together REALLY fast and before I knew it I had it wrapped and in the fridge.  I didn't have a lot of time left so I left it in the fridge overnight.  The next day I pulled it out of the fridge.  It was pretty hard at first.  I took some aggression out on it with the end of my rolling pin and that helped soften it up :)


I decided to only make two with the apricot lekvar, so I still have an entire jar left.  I will have to come up with something yummy to do with that!  I decided to melt some chocolate chips I had in the pantry and make a chocolate one, I also had leftover freeze dried raspberries from the tarts that we made a couple of weeks ago and I decided to crush these over the melted chocolate.   For the fourth roll I chopped up white chocolate, craisins and dried apricots.


Rolled up apricot lekvar coated in egg wash


rolled in cinnamon, sugar and nut mixture


Gooey mess :)


Just begging to be eaten


The Rugelach with the apricot lekvar are really good, the lekvar was not too sweet but had a nice fruity flavour and added a lovely texture.  The cinnamon, sugar, nut mixture over the outside took it over the edge.  I chose not to add nuts and dried fruit to the inside, it seemed like too much and I have picky selective kids.  I really wanted them to enjoy these.   The pastry was so flaky and the perfect vessel for the fruit, sugar and nuts.

The next one I baked was the white chocolate, apricot and cranberry filled rugelach.  I didn't cover it in cinnamon, I decided just plain sugar would be enough and wouldn't take away from the flavour of the fillings.  This combination of flavours was delicious and the chewyness of the fruit contributed nicely to the texture.  The flaky pastry.  Oh.my.gosh.  I really like this pastry!

Here is the white chocolate rugelach after I pulled it out of the oven.  I tried laying some flat and some on their side this time.  I really prefer the way they come out when they are layed on their side.  When I layed them flat they just spread more and looked kind of sad.  They still tasted fine though :)


Finally I baked the chocolate raspberry combination.  These ones I coated in a sugar/chocolate mixture.  I have a little shaker of chocolate dust to sprinkle over hot chocolate, so I combined this with the sugar to make the outside a little chocolaty as well.  I am a firm believer that there is no such thing as too much chocolate!  These were good too, but I think the fruit ones are going to be the favourite.  When I pulled them out of the oven I could smell the raspberry and there was a nice hint of it in the cookie itself.  Good for a chocolate fix!  However now I need to go for a run to remove any damage to my hips from tasting the different cookies!

Here is the chocolate raspberry, rolled in chocolate/sugar and ready to go in the oven.  You can see a little bit of raspberry peeking out. Yum.


After they came out of the oven, they smelled so good!


Finished product from left to right chocolate raspberry, white chocolate, cranberry and apricot, apricot lekvar


Next time we are making Irish Soda bread, so stay tuned!  I will do my best to NOT wait until the last minute on this one :/  I might even check out the recipe today (and actually read through the directions ha).  This has been so fun, I am enjoying baking with a community and going through the ups and downs with all of you!