Thursday, April 19, 2012

Lettuce wraps and a bump in the road


In an effort to lead a less chaotic lifestyle the hubs and I tried to get organised this week.  We have five offspring, three of which are definitely old enough to help out around the house.  They have/had designated chores that we needed them to do daily, to keep the family functioning (we were very LOW functioning so it was basic stuff).  However, there was not really a system in place and it often ended up being 10 or 11 at night when they finally got around to doing some of these things.  The hubs and I are also guilty of procrastinating, letting things slide and putting things off more often than we should.  I'm pretty sure it's a genetic disorder we have passed down to our kids :)

This last weekend we decided we were done with the chaos (at least temporarily, this isn't the first time we have felt like this) and we made a plan to get it under control.  We divided up the house amongst the five older family members (3 big kids and mum and dad) and tidied up.  Then the hubs pulled out my binder of 'go to' recipes and had the three older kids each choose one meal for dinner, this covered three nights so we asked them between them to try and pick two more.  This was much more effective then asking them an hour before dinner what they would like.  It seems at that time they never have an answer, well except for pizza, burgers or chinese take out :/  Which are certainly valid answers, but not entirely budget friendly when you are feeding 7 people! 

The hubs and I are on a strict Jared (subway) diet.  Trying to lose weight before our first vacation in over 4 years that is fast approaching!!  So while we have a meal plan all taken care of, the hubs is driving to Subway twice a day to get us 'diet' food.

The kids chose the following meals for this week's dinners

Monday:  Asian chicken (how's that for a non descriptive name)
Tuesday:  BBQ Beef Sandwiches
Wednesday: Sweet & Sour Chicken
Thursday:  Lettuce wraps adapted from The Pioneer Woman
Friday: Burgundy Beef over egg noodles

Even though the hubs and I have been strictly sticking to our Subway diet, I have sampled the food I was preparing, quality control is awfully important to me ;)  That was brought to a screeching halt today.  I never tried the lettuce wraps pictured below which was this evenings dinner.  The kids said it was good and gobbled up multiple helpings so I will take their word for it.


Today I went back for a follow up visit to my Allergist.  I haven't felt well, pretty much ever since I can remember.  I have suffered from eczema all of my life and mild stomach discomfort.  The symptoms have been getting worse as I get older and right now my eczema is extremely bad (for me) and getting worse.  I was/am feeling run down, generally feeling unwell, itchy, achey and have had stomach aches almost daily.  It got to the point that it got really old and I wanted answers.  Now that I have some I am not sure I still want them (jk.....sort of).  Food ALLERGY testing all came back negative.  Not a big surprise, nothing I eat makes me react instantly.  The issue I am having is a delayed reaction and the above symptoms I am experiencing are indicative of a food intolerance. 

I suspected wheat and egg yolk and I was correct, they both came back positive, but gluten (which I also suspected) came back negative.  I didn't suspect garlic and almonds, but they also came back as culprits.  What's the verdict?  I am to avoid wheat, egg yolk, garlic and almonds for 3 months and then have my blood drawn again to see if the numbers go down.   The next three months are going to be challenging.  Thankfully Subway has gluten free rolls now and according to the hubs (who is tasked with getting our food everyday) they take it quite seriously when making a gluten free sandwich.  They asked him if he was ordering gluten free because of a food allergy, when he answered it was for a food intolerance they wiped everything down, changed gloves and utensils and then pulled out the gluten free roll.  Good for you Subway!

So moving forward for the next three months, I will try to bake wheat free/egg yolk free treats.  This might prove to be interesting but I am up for the challenge.  I CAN DO THIS!  Right?  I wish almonds weren't a problem because almond meal makes a great flour substitute in some baked goods like cookies and tarts.  I'll figure it out, I have already been looking at ways to get through the next TWD challenge, Hungarian Shortbread!  Yikes!  I have some ideas though, no procrastinating on this one, I am making my shopping list tonight so I can try it well before May 8th :)  Wish me luck!


Tuesday, April 17, 2012

TWD ~ Lemon Loaf Cake

The second recipe for April was Lemon Loaf Cake, you can find it on pages 252-253 in Baking with Julia by Dorie Greenspan.  If you would like the recipe for the cake go and visit this week's hosts Truc of Treats and Michelle of The Beauty of Life.  Even more fun, if you want to see how everybody did go here and check out the links to each participant's blog!  I love seeing how differently everyone makes the same recipe, I'm sure you will too :)

First things first, I prepared the loaf pan and gathered all of the ingredients.


Now the instructions were really simple and I probably didn't need to use my mixer, but I just upgraded my old mixer for a new one and I had to break it in.  So perhaps it was overkill and it may be responsible for the heavyness of my loaf cake by overmixing it.  I'm not sure, but I'm ok with it because I got to play with my new kitchen toy! 


After mixing all of the ingredients together I put it in the loaf pan and let the oven do it's thing for about an hour.  Here it is after removing it from the pan.  Looks good!


After reading the reviews of the recipe on the TWD site I saw that fellow baker's thought that it lacked the zing that you would expect a lemon cake to have.  So I made Meyer Lemon Curd to compliment it and add that additional lemon flavour I thought it might need.  I also decided to glaze it. I made a simple glaze using the juice from the lemon's that I took the zest from for the recipe.  It made a really nice bright sweet addition to the crust of the lemon loaf.

Simple Lemon Glaze
3/4 cup fresh squeezed lemon juice
3 cups powdered sugar
2T butter

I served it with the lemon curd on top and the fam gobbled it up.  The hubs and I both agreed that it was a bit too dry for our taste and the lemon flavour was barely there, but that didn't stop us from each eating two pieces ;)  We really adore the lemon curd, so even if I never make the cake again it did give me the inspiration to make lemon curd and I will definitely make that again!


Friday, April 13, 2012

Meyer Lemon Curd

Next week's TWD is Lemon Loaf Cake.  After reading some of the comments other bakers wrote about the loaf and it's flavour I decided that maybe I needed to kick it up a notch, flavourwise.  So I scoured my favourite baking books and found a recipe for Meyer Lemon Curd from Joy the Baker Cookbook.  This seemed like the perfect recipe to compliment the upcoming recipe for TWD.  I sent the hubs to Whole Foods to buy some Meyer Lemons and I got to cooking. 


Meyer lemons are thought to be a cross between lemons and mandarins, they are sweeter than lemons which makes them perfect for baking with in lemon desserts.  They have a lovely orange colour and smell delicious! 


This recipe was really quick to pull together, which is my favourite kind of recipe and it came out wonderfully. 

I have not yet figured out how to whisk/stir/pour while simultaneously taking pictures so I don't have a step by step photo progression to share.  Perhaps I need to invest in a tripod?  Anyway, trust me in that it is simple and the results are delicious!


Meyer Lemon Curd
makes about 1 cup

1/2 cup fresh Meyer lemon juice (from 2-3 lemons)
1/3 cup granulated sugar
2 large eggs
2 large egg yolks
Big pinch of salt
1/2 cup (1 stick) unsalted butter

Place a fine mesh strainer over a medium bowl.  Set aside for later.

In a medium, heavy-bottomed saucepan, whisk together lemon juice, sugar, eggs, yolk, and salt over medium-low heat.  Whisk and heat until egg yolks have thickened the mixture.  The mixture will go from smelling like citrus to smelling directly like lemon curd.

When thickened and fragrant, immediately remove from heat, and whisk in the butter.  Use a spatula to pour the warm curd into the strainer fit over the bowl.  Use a spatula to move the curd through the strainer, leaving any cooked egg bits in the strainer.  Pour strained curd into a small, airtight jar and refrigerate until chilled.  Serve over biscuits or toast.

Meyer Lemon Curd will last, in an airtight container, in the refrigerator for up to 4 days.

If you don't own Joy the baker cookbook, I highly recommend investing in it.  It is a fun baking book with a different spin on some typical and not so typical dishes.  I love her creativity and can't wait to try more of her recipes!

Enjoy!


Monday, April 9, 2012

Colouring Easter eggs

I always have the best intentions to decorate eggs with the kids before Easter Sunday.   However, for some reason we always end up doing them ON Easter Sunday.  I wish I was more organised and less of a procrastinator but I am a work.in.progress. 

I took inspiration from different blogs I follow. Surprise! :)  At Artful Parent she demonstrated how to use hole reinforcement stickers to create designs.  At Crap I've Made she used rubber cement to create a design on her eggs.  We used both of these methods, I had a 14yr old, 10yr old, 5yr old (with help from 15yr old) and 2yr old decorating eggs.  As you can imagine I was a little distracted and only took one process shot of dying the eggs! 

Lady S used a mini whisk to hold her eggs in the dye.  I found this to be much easier than her using a spoon because the temptation to stir and splash dye all over the place is strong with this one!  My 15 year old said she saw this somewhere online and suggested I try it, I am glad she did.  It worked really well.  When removing a couple of her eggs some of the dye scratched off the side but she didn't notice, she just wanted to stick stickers on and dip the eggs in and out of the dye.  If you think my child doesn't own clothing, you are wrong.  She owns lots and lots of beautiful clothes, keeping them on her is a wholenutherstory :/


When I went to the office supply area of the store (to get the hole reinforcement stickers) I saw some other stickers that I thought we could use.  So I bought stars and polka dots as well as a bag of rubber bands for wrapping around the eggs before dying. 

What I found really interesting about Artful Parent's eggs is that she used brown eggs.  I NEVER dye brown eggs and didn't this year but I am definitely going to give that a try in the future!  My colours on my eggs were not as rich as either bloggers.  I am determined to get my eggs as bright and perfectly dyed as they were at both Artful Parent and Crap I've Made! 

Below is a picture of some of the eggs we dyed.  I will add more if I get a chance to photograph them before the kids eat them :)  The hole reinforcement stickers were challenging to get off and some left a sticky residue on the eggs.  The stars were easy to get off and sometimes peeled up at the edges or came off in the dye, so it was difficult to get a perfect star.  The polka dot stickers were easy to get off and stuck well to the eggs to make cute polka dot eggs.  They were my favourite design.  The rubber cement was a bit tricky at first but I got the hang of it.  I like how the eggs looked with the rubber cement design (both the pink and blue eggs pictured below used that method).  All in all the polka dot was my favourite though. 


Saturday, April 7, 2012

Hard baked eggs

I was very skeptical of this method of cooking eggs when I first saw it on Pinterest.  The thing is that I dislike boiling eggs enough that I was willing to try anything!  I almost always get that grey ring around the yolk and the stress of not knowing until you open it up was too much ;)  Like I said I was skeptical, so I decided to just cook four eggs at first.  I was so surprised when I sliced the egg and saw that is was cooked PERFECTLY!  I was absolutely shocked, but also happy because this meant that I did not need to boil eggs to get hard boiled eggs anymore!  This makes Easter so much easier for me as I usually have to boil at least 2 dozen eggs for the kids to colour.  

So today I baked 24 eggs in preparation of egg dying with the kids, I followed the directions I found here .  I set my oven to 325 degrees F as my oven tends to run slightly hot and the original instructions said to preheat your oven to 325-350.   I put 24 eggs in a mini muffin pan, popped them in the preheated oven and set the timer for 30 mins. 

Here are the eggs ready to go in the oven


While they were cooking I prepared an ice bath for them


I also made sure I had a place to put the muffin pan (to protect my countertop) and rubber tongs are for transferring the eggs to the ice bath.  Any tongs would work but the rubber adds a bit more protection from slipping.


See the brown spots?  These wash right off in the ice bath.


Transfer the eggs as fast as you can to the ice bath to stop the cooking process


After sitting in the ice bath for about 10 mins I removed them and placed them into the egg carton.  Notice this only holds 18 eggs.   We might have eaten 6 before I even got them into the fridge :)


I have noticed this on some of the eggs but not all.  A brown spot where I suspect it was touching the muffin pan while cooking.  They don't taste any different and I am trying to think of ways to avoid this.  I wonder if silicon muffin cups might help protect them from getting these spots?  It doesn't bother me enough to go back to boiling them.  Another thing I have noticed is that I have not had a single cracked shell!  When I boil eggs I always have at least one (usually more) eggshells crack.  Which is really frustrating when dying, unless you want this effect .


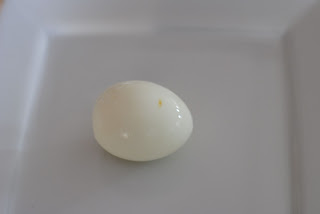
The moment of truth.  I sliced the first egg right down the middle.  I think I could have pulled them out a couple of minutes earlier but they are pretty darn good if I say so myself! :) 


So a basic run down of how to do this.
1. Preheat oven to 325 - 350 degrees F
2. Place eggs in mini muffin pan
3. Place eggs in oven
4. Bake for 30 mins
5. Remove and place immediately in ice bath for about 10 minutes
6.  Peel and enjoy, or refrigerate

Enjoy :)

I am hoping to show pictures of our eggs dyed, we are going to try this method this year and hopefully it turns out!


Friday, April 6, 2012

Deep Dark Mocha Cupcakes

As promised here is the review and recipe for the cupcake recipe included in my Enjoy! gift package.  I knew these would be a hit here, especially with the hubs and the oldest of my offspring.  They both love coffee anything! The batter and the frosting have espresso powder in them, you can faintly taste the espresso powder in the cupcakes but the frosting had a delicious coffee flavour that complimented the cupcakes very nicely. 

I love these cupcake liners.  I thought the ones I was buying locally were good but now I am hooked on these. 


The batter was thick and glossy, and smelled divine. 


Here are the cooling cupcakes


The frosting smelled SO GOOD and just the coffee aroma was enough to keep me going through the afternoon.


Here is my helper, asking me to take a picture of her 'Rapunzel' hair LOL


The finished product.  I did some with and some without sprinkles.  Of course the kids went for the ones with sprinkles first ;)


While I was taking photographs I turned around to see this.  My middle child :)


I made these on a stormy afternoon here in north Texas.  As it turned out oldest child was released from school about 15 minutes early so she had an opportunity to get home safely.  We ended up having 11 tornadoes touch down in the DFW area.  Instead of saving the cupcakes for dessert we ate them while watching tornado coverage on the television.  A little comfort food while we waited to see if we were in the path of the destruction.  We just ended up with some heavy rain and a little bit of pea sized hail.  We were lucky that the storms went around us and our thoughts are with those families whose homes were damaged.  

On a positive note, oldest child says she must have these for her next birthday and that they were the best cupcakes she has ever eaten!  How is that for a positive review.  You should make these!   

Deep Dark Mocha Cupcakes from Joy the Baker
makes 12 cupcakes

1 cup plus 2T all purpose flour
1 cup packed brown sugar
1/2 cup double-dutch cocoa
1 tsp baking soda
1/4 tsp baking powder
1 tsp instant espresso
1/4 tsp salt
1/3 cup vegetable oil
1 cup buttermilk
2 tsp pure vanilla extract

Preheat oven to 350 degrees F.  Line cupcake pan with paper liners and set aside.  In a large bowl, sift the dry ingredients together.  Set aside.  In a medium bowl, whisk together the oil, buttermilk, and vanilla extract.  Slowly whisk the wet ingredients into the dry ingredients being careful not to over-mix.

Spoon the batter into the prepared cups and place in the oven for 20-24 minutes or until a toothpick inserted into the center of the cup comes out clean.  Cool in the pan for 10 minutes then place on a wire rack until completely cool before topping with espresso buttercream.

Espresso Buttercream

1/2 cup (1 stick) unsalted butter, softened
3 cups sifted powdered sugar
1 tsp pure vanilla extract
2 tsp hot water
1 tsp instant espresso powder

In the bowl of an electric stand mixer fitted with a paddle attachment, beat butter and one third of the sugar.  Beat until thick and incorporated.  In a tiny bowl, stir together vanilla, hot water, and espresso powder.  Stir until powder is dissolved.  Add the remaining sugar and espresso mixture to the bowl.  Beat on medium speed until smooth and slightly fluffy.  Spread on cooled cupcakes.  Top with sprinkles.


Thursday, April 5, 2012

Gift club

I follow several blogs, mostly food blogs because.......well.....I LOVE FOOD!  Food is beautiful, healing (emotionally AND physically), delicious, sexy, soulful etc etc I could go on but I will spare you.  Over the holidays I had sent the hubs a very subtle email with a link to a new gift program one of my favourite food bloggers, Joy the Baker, had started.  I often send him emails with links to things I like. I like to think that I am doing him a favour.   This way he doesn't have to try to figure out what is on my wishlist because he has it right there in his inbox :)  It's my gift to him! 

Well it just so happens that when he went to purchase the gift subscription for me for the holidays it had closed to new subscribers :(  However, he did mark on his calendar when subscriptions would open again.  Well that time came and he went to sign me up and they had closed again.  Bummer!  He ended up emailing the blogger and telling her the situation and she signed me up and gave him kudos for being a good hubby ;)  So YAY I was so excited.

Well the gift club is a quarterly thing, so by the time it came for the gifts to be sent out I had forgotten it was coming!  Which is fabulous because when the box arrived in the mail I was surprised :)  I love surprise gifts, even if I had signed up for it.  It was a fabulous gift that included a recipe postcard personally signed by Joy the Baker herself.  I loved everything in there and was anxious to try the recipe.  It just so happens that the very same day her cookbook had arrived in the mail as well.  It was a Joy the Baker kind of day at our house! 

I put the recipe card aside and only just pulled it out the other day to make the cupcakes.  I will post the cupcake results next time but I really wanted to share with you what was in my gift box.

Here is how my lovely gift was packaged


Here are the contents of the box, except the book which was bought separately by me from Amazon :)
1. Chocolate sprinkles
2. Double-dutch dark cocoa
3. Espresso Powder
4. Pastry scraper
5. cupcake liners
6. recipe postcard (personally signed)
7. $10 gift card to King Arthur Flour


I was so excited by this gift, even the hubs was excited for me (and for him, the cupcake recipe was right up his alley ;) )

If you are interested in joining this gift club you can find information at Enjoy!


Tuesday, April 3, 2012

TWD - Pizza Rustica

First challenge of April was Pizza Rustica located on pages 430 and 431 of Baking with Julia by Dorie Greenspan.


 If you are interested in the recipe you can find it posted on this weeks hosts blogs Emily of Capital Region Dining Blog and Raelynn of The Place They Call Home .  If you would like to see how all of the baker's did on this weeks challenge you can find those links here.

I was not sure about this recipe, it looked very quiche like to me.  I happen to love quiche but I have some younger family members that don't share my love of  'egg pie'.  Of course to them the title of the recipe is quite misleading.  When I said we were having Pizza Rustica for dinner they weren't expecting what was served to them ;)

The recipe was nice and simple and it came together quite fast.  I love how simple the dough was and that I didn't have to wait for it to chill in the fridge.  I am such a procrastinator that it made all the difference in getting dinner on the table on time! 


First step was getting all of the dry ingredients into the food processor and pulsing to combine


Then it was to add cold unsalted butter and pulse until it became like cornmeal in consistency 


Once the butter was combined I added the eggs


After it balled up around the blade it was ready to take out and knead.  Super easy!


It was a moist dough and it never quite got 'smooth' like it indicated it would in the directions.  Perhaps I am being too literal?


It was more of this almost bubbly texture.  This was after a couple of minutes of kneading and it wasn't changing consistency at this point so I decided to stop in case I overworked it.


The ingredients were very basic, which I love.  Eggs, ricotta cheese, mozzarella, pecorino romano, prosciutto, parsley and black pepper.  I mixed those ingredients together while the oven preheated. 


First I put the ricotta in the bowl and blended it with a rubber spatula.  Then I added the eggs so I had an easy mixture to add the other ingredients into.  In this picture it already has the prosciutto and I am adding the pecorino romano, which I cheated on and bought it already grated.


The mozzarella required weighing so I pulled out the scale.  Can I just say this scale is da bomb! 


I added the parsley last as the hubs was picking some up from the grocery store for me while I was mixing the other ingredients ;)  It just didn't make it onto my mental grocery list!


I rolled out the pie crust after everything was mixed and layed it in the pie pan.  It was a soft dough but easy to handle.  This pie crust is so simple and I know I am going to use it again in the future!


Here it is after adding the filling.  I panicked a little thinking my pie pan was too big because the filling seemed to be low, but it was just right.


I rolled out the remaining pie dough and cut it into 12 strips with my pastry cutter (that the hubs picked up while he was getting parsley.......keeper :) )  My strips weren't even but I made it work the best I could.


They look a little wonky after baking but not too bad!  It was reminding me more and more of quiche, even though the filling was more cheesy than eggy.  Pastry is one of my favourite parts of any pie, quiche or otherwise, so I was looking forward to having pastry on top as well as underneath.  Yum.

Here it is straight out of the oven


I let it rest while the hubs and I worked on a home project and served it just warm for dinner


Comparing my Pizza Rustica to the picture in the book (at top of page), I noticed that I don't seem to have as much fillings as pictured.  There seems to be much more prosciutto in the book's pictured Pizza Rustica, in comparison mine looks a bit boring.


My first bite was not what I expected.  I'm not sure why, I saw what I put in there ;)  However the texture of the ricotta can be a bit grainy/chalky/gritty?  I'm not sure how it's best to describe it, but it's not my favourite texture.  The flavour was good.  The pecorino romano added a nice saltiness, it could have used a little more prosciutto.  I'm sure other ingredients would be delicious too.  Mushrooms and onions come to mind, or possibly spinach or fresh herbs such as thyme, oregano or basil.  I was not sure about the sweetness of the dough.  At times it seemed complimentary and other times just too sweet for a savoury dish.  I would probably cut down the amount of sugar in the future.  I see a lot of potential for variety and definitely have not written this recipe off.  With how simple it is it would make a nice potluck dish or would be good for casual entertaining.

Now having said that, not one of my kids liked it :) :(  I served it with salad and you might have thought I was torturing my offspring.   I may have particularly picky children, even my adventurous (I use that term loosely) eaters were not keen on it.  Oh well.  I'm sure they'll hate the lemon loaf cake that we are making next ;)